Summary:Braiding has been commonly used to make strong cording for ties, lacings, etc. While lucets and fingerloop braiding have been much discussed in the SCA, whip-cording or interlocking hasn't been fully investigated. Multiple methods have been devised to control the ends of the loose threads to be braided. Fingerloop braiding uses the thread in loops over the fingertips to manipulate the formation of a cord. Some can leave the threads loose, but they risk tangling and the going can be slow. The vikings devised a way to use heavy bobbins to control the ends of the thread. The beginning of the cord is attached overhead firmly, and the bobbins are manipulated to form the cord, while the weight of the bobbins controls the threads and keeps tension. Some may have heard us flippantly call this "Spoon tossing" as in earlier experiments we used pewter seal top spoons because they were handy. Resources:We first learned this technique from a demo held at the Smithsonian by a Norwegian Museum during the Vikings in America Exhibit. They had four already loaded bobbins with wool yarn and had instructions and a kind lady to walk you through it. A team of two made a cord on the spot in less than 10 minutes. We took home our sample cord and a pamphlet on something called Interlocking. Later I found further documentation for this in Margrethe Hald's Ancient Danish Textiles. Lastly I found a webpage by Danr Bjornsson where he made bobbins for his lady to practice this art. I am constantly seeking further information. Margrethe Hald [p. 240] discusses a leather cord discovered among the Krogens Molle Mose material that could have been made using the whipcord method. Leather cord would have survived better underground than wool. Apparently Scandinavian children still practiced this as a game until recently. She also shows examples of a similar method used in ancient Persia and Palestine that involved slings for stones as the weights instead of bobbins. One of the main strengths of using this method to produce cording is that you are not limited, either by your arm span or amount of time taken, in the length of cording you can make. You can wind extra thread on the bobbins and let them out as you need a longer cord. You can also pause easily and let the bobbins hang and pick it back up at any time. One of the main weaknesses is that it is difficult to use this method for a cording that requires more than 4 threads. |
|||||||||||||||||||||||||||||||||||
Materials:The bobbins seem to have been made of wood. If you are mostly interested in the cord product you can use anything as a weight as long as the items are all the same weight, not too heavy to break the cord, and have a neck that keep the threads from sliding off. I found that the bobbins Alan made for me are fairly ideal because they are small enough to fit in my hands, large enough to keep track of and the faceted sides help me if I need to leave the project and pick it back up at a later date. We have used half full bottles of water, pewter seal top spoons, and bobbin lace bobbins with additional weights tied on the ends. The common thread used during the viking age is wool, as that was readily abundant and fairly easily spun. I have used anything from cotton, linen and silk with good results, but giving different textures and sizes. The thicker the thread or yarn, the thicker the cording will be. I have used two threads of a lesser diameter on each bobbin to produce a thicker cord. The bobbins will need to be suspended from something overhead to be at a workable height. I have a planter hook in the ceiling of my sewing room. I have used the rope for attaching walls in the doorway of a pavilion, chandeliers, and pretty much anything stably overhead. I imagine that one could easily use a tree branch overhead, a clamp in a doorway, or many other secure methods.
|
|||||||||||||||||||||||||||||||||||
Procedures:The set-up is the same whether you use one or 2 workers. First make your four threads the same length, roughly 2-3 yards, and then loop them up so that you have 4 loops 1 to 1.5 yards long. Tie a knot in the top at the loose ends. Secure the knotted end overhead. The easiest method to put the threads on the bobbins is to make a half hitch with the loop and tighten it around the neck of your weight. This is why the seal top pewter spoons, bobbins and bottles work well, they hold the half hitch in place. Once all four bobbins are attached to the four loops, you are ready to start weaving.
If you wish to load more than just what will hang, like the picture from Hald, this is easily done, but only with bobbins. If you know how to wind bobbins for bobbin lace, this is the same technique, only on a larger scale. Start with a simple knot of the thread on the neck of the bobbin. Then wind the thread on, as much as you wish. When you only have available what you want to start working with, use a slip knot to fasten it onto the top of the bobbin. The idea behind using a slip knot is that you can then make the strings longer at will, but they will hold as well. A slip knot is formed when you make a loop with the thread, and then pull another loop up though the first. Lace bobbin winding instructions: The Swap: For two workers, each worker holds a bobbin in each hand. Then they diagonally swap the bobbins to create the cord. Right hands switch and then the left hands switch. Lather, rinse, repeat. You swap bobbins as if you were shaking hands, palm to palm. You do not want to swap on the other side, with the back of the hand. You need to make sure that the path is consistent for both hands so that a cord is formed and not two independent sets of entwined threads. For an individual, hold two bobbins in each hand. Switch them diagonally as with two workers, only keeping the other two bobbins stationary. You want to keep these traveling a consistent path as well. Margrethe Hald describes the one person method fairly well. She has you suspend the bobbins on the right hand, over the back of the hand. The bobbins in the left hand are held by the strings with the thumb and pinky fingers. You want to swap them, once again, as if you were going to brush your own palms together. With the facetted sides of my bobbins they are easy to manipulate without getting out of control.
Patterns:If you select only two colors to make your cord, you can do two different patterns. To make a striped cord, you each (or each hand) gets a bobbin with one of each color. If you set up so that your right hands have the same color and your left hands have the same color, when you swap the bobbins diagonally across you will make a striped cord. For example, light thread in the right hands and dark thread in the left hands will make the striped design. If you want the cord to have a spiral design then one worker (or hand) gets the two of the same color and the other gets the remaining two in a different color. For example, one worker gets the light colored threads and the other gets the dark threads. Then if they start swapping, the created cord will appear like a spiral, much like a design made with a type of fingerloop braiding.
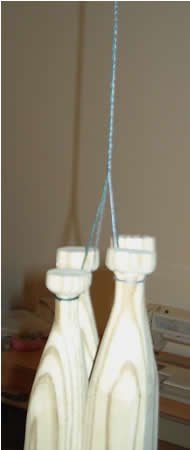
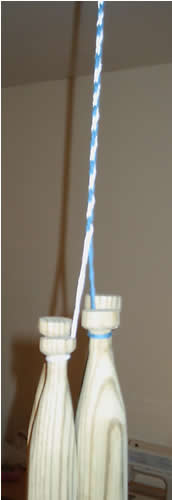
Bibliography:Hald, Margrethe. Ancient Danish Textiles from Bogs and Burials. National Museum of Denmark, Copenhagen, 1980. ISBN 87-480-0312-3. Pamphlet on Interlocking, Skoletjenesten Vikingeskibsmuseet 1999, scanned in and uploaded at http://genvieve.net/sca/interlocking.pdf Willadsen, Don. Whipcord Braiding Bobbins by Danr Bjornsson, 2002, http://bjornsson.crosswinds.net/sca/danr_as/bobbins/bobbins.htm In Progress pictures: Green and gray cord in progress, made using wool-silk blend threads. And Blue and white cord in progress, made using cotton yarn. |
|||||||||||||||||||||||||||||||||||


